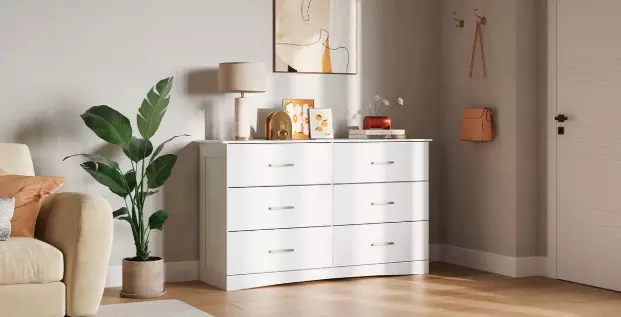
How to Assemble the WLIVE Dresser for Bedroom
Assemble the WLIVE Dresser for Bedroom

When it comes to affordable, stylish, and functional storage solutions, the WLIVE dresser is a favorite for many homeowners. Not only does it help keep your bedroom organized, but it also adds a modern touch to your décor. Whether you’ve purchased a fabric style dresser or a sturdier wood-and-metal version, knowing how to assemble it correctly is key to ensuring it’s stable, durable, and long-lasting.
If you’ve just bought a WLIVE storage cabinet or dresser and are ready to set it up, this step-by-step guide will walk you through the process. With a little patience and the right tools, you’ll have your new piece ready to use in no time.
Step 1: Unbox and Organize the Parts
Start by carefully unboxing your wlive dresser. Lay out all the pieces on a clean floor or large table, making sure nothing gets scratched. Inside the package, you should find:
- Side panels and top/bottom boards
- Drawer frames and fabric bins (for fabric dressers)
- Backboard panels
- Hardware set (screws, bolts, washers, dowels)
- Assembly manual
- Small tools like Allen keys (included in most sets)
It’s a good idea to organize all parts and check them against the manual to ensure nothing is missing before you start assembling.
Step 2: Gather Your Tools
While the wlive storage cabinet often comes with the essential assembly tools, having your own screwdriver or power drill can make the process much faster. Commonly needed tools include:
- Phillips head screwdriver
- Flathead screwdriver
- Hammer or rubber mallet
- Power drill (optional for quicker assembly)
Step 3: Attach the Side Panels to the Base
Begin with the dresser’s main structure. Following the instruction manual, connect the side panels to the bottom board. Use the screws or bolts provided and tighten them securely, but avoid overtightening to prevent damage to the boards.
For larger WLIVE dressers, you might also need to attach supporting beams or metal bars for extra stability.
Step 4: Install the Drawer Rails
The drawer rails are what allow the drawers to slide in and out smoothly. Each rail has a left and right side, so make sure you’re installing them in the correct position.
Attach the rails to the side panels, using the pre-drilled holes as guides. This step is important — if the rails are misaligned, your drawers may not fit correctly.
Step 5: Assemble the Drawers
If you have a WLIVE dresser with fabric drawers, this step will be quick. Simply unfold each fabric bin, insert the base panel inside, and set them aside.
If your WLIVE storage cabinet has wooden or MDF drawers, assemble each by connecting the side panels to the front and back pieces, then attach the bottom board. Secure with screws and make sure all edges are aligned.
Step 6: Add the Top Panel
Once the base frame and drawer rails are in place, attach the top panel of your WLIVE dresser. This will lock the structure in place and give the dresser a finished look. Secure with screws or bolts as directed in the manual.
Step 7: Secure the Backboard
Attach the thin backboard panel to the rear of the dresser. This adds stability and prevents the frame from wobbling. Most WLIVE storage cabinets come with small nails or screws for this purpose.
Step 8: Insert the Drawers
Now that the structure is complete, slide the drawers into place. Fabric bins should fit neatly into their designated slots, while wooden drawers should glide smoothly along the rails.
Step 9: Anchor to the Wall (For Safety)
If your WLIVE dresser is tall or heavy, use the included safety straps to secure it to the wall. This prevents tipping, which is especially important if you have children or pets at home.
Step 10: Final Check and Styling
Double-check that all screws are tight and the dresser is level. Once everything is secure, you can style the top of your dresser with décor like a lamp, plant, or picture frames.
Tips for a Smooth Assembly Process
- Work with a Partner – Larger WLIVE dressers are easier to assemble with two people.
- Follow the Instructions – Even if you’re experienced with furniture assembly, the step order in the manual is designed for efficiency and safety.
- Use a Drill Carefully – If you use a power drill, keep the speed low to avoid stripping screws.
- Take Your Time – Rushing can lead to mistakes and misalignment.
Why Choose WLIVE?
The WLIVE brand is known for making affordable, stylish, and functional furniture. Whether it’s a WLIVE dresser for your bedroom or a WLIVE storage cabinet for your living room, their designs combine modern aesthetics with practical features.
Many of their dressers use lightweight yet sturdy materials, making them easy to assemble and move around when redecorating. Plus, the quality craftsmanship ensures that your furniture will last for years with proper care.
Final Thoughts
Assembling a WLIVE dresser might seem intimidating at first, but with clear instructions and a little patience, it’s a straightforward process. The end result is a functional and attractive piece of furniture that keeps your bedroom organized and stylish.
If DIY assembly isn’t your thing, you can always hire a local furniture assembly service — but for many customers, putting together their WLIVE storage cabinet is a quick and satisfying project.
Once it’s assembled, you’ll appreciate the convenience, style, and storage it adds to your space — a true example of why WLIVE continues to be a trusted name in home furniture.

